Printing Angiograms
|
Janice Clifton, CRA COT |
Paul R. Montague, CRA FOPS |
Photographic Illustrations by |
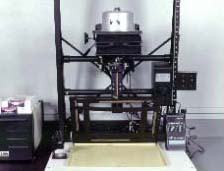
Making an Enlargement is quite similar to making a contact print, the primary difference being that a single negative will be chosen for printing. Instead of placing the negative in contact with the printing paper, it will be placed in the negative carrier of the enlarger and projected onto the paper which will be held in place by an enlarging easel.
Setting the Enlarger. Place the printing easel on the enlarger base. If using an adjustable easel, set the blades for the size of print to be made. Prints are usually produced with a ¼ inch white margin. This is accomplished by setting the blades on the easel to be ½ inch smaller than the dimensions of the paper. A speed easel is preset for a specific size of paper and will produce prints with ¼ inch borders.
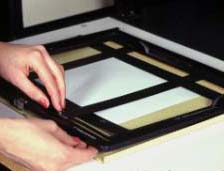
Adjusting the Easel Blades
Select the negative to be printed. Place the negative in the negative carrier emulsion side down. The emulsion side can be identified in a number of ways: The emulsion side is usually the dull side of the film, the film usually tends to curl toward the emulsion side, when the words printed on the edges of the film can be read the emulsion is away from you, and when the little arrows on the edges of the film point counter-clockwise the emulsion is away from you. Placing the film upside down in the enlarger will produce a mirror-image of the subject.
It is usually easier to work with an enlargement when the image is right-side-up on the paper. When the negative is placed in the carrier with top toward you, the top will be away from you on the easel.
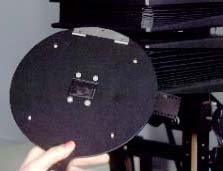
Negative in Negative Carrier
Adjust the image size by turning on the enlarger light with the focusing switch on the enlarger timer. Open the aperture on the enlarger lens by twisting it until the projected image is at it’s brightest point. Adjust the height of the enlarger until the projected image is the size of the print area on the easel. Roughly focus the enlarger.
Crop the image by looking at the composition on easel. Most angiograms will be printed full-frame: That is, the entire negative will be printed. Simply adjust the enlarger height and focus until the image appears sharp and a very small amount of the image falls on the leafs of the easel to give a sharp border.
Sometimes, especially with images other than angiograms, it is desirable to print only a portion of the negative. By making the projected image larger than the print area on the easel, the image can be cropped so that only a portion of it is printed. This technique might be useful for drawing attention to a lesion in center of the macula, or for straightening the horizon in a scenic photograph.
Focus the image critically with a magnifier. The high magnification type, called grain focusers, offer the most critical focus. Place the magnifier on the easel and look into the eyepiece while slowly twisting the focus knob on the enlarger. When the image (or grain) appears sharp, check to make sure the image still covers the entire print area on the easel. Changing the focus changes the size of the image slightly.
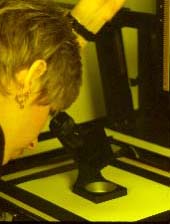
Focusing the Image
Always focus the image with the lens wide open, so that the image is the brightest on the easel. For one thing, the image will be brighter and easier to see, but the primary reason is that the projected image has far less depth of field when the lens is open, making the point of true focus much more obvious. Once the image is focused, the lens can be closed down for exposure.
Make a test strip. The procedure for making test strips can be nearly identical to making a test strip of a contact sheet which we covered in the Making a Contact Print section.
Close the lens till the image is at it’s darkest point, then open the lens two stops (two "clicks" of the f-stop ring). After becoming an experienced printer you will be able to judge the amount of light falling on the easel, and may be able to simply close the lens to a point where the print exposure will be about 10 seconds. But this takes considerable practice.
Set the enlarger timer for 2 seconds as was done during contact printing. Place a whole sheet of paper in the easel. Place a piece of cardboard over the paper, revealing about 1½ inches at the end. Press the expose button on the enlarger timer to make a two second exposure. Move the cardboard slightly, revealing another 1½ inches of paper, and make another two second exposure. Repeat the process until the entire test strip is exposed.
There are many variations on this theme. For example, it is not necessary to use an entire sheet of paper for test strips. A sliver of paper 3 inches wide could serve the purpose quite well.
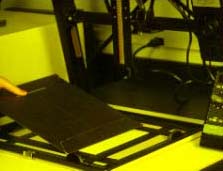
Exposing a Test Strip
Once exposed, process the test strip by placing it in paper developer for 2 minutes with agitation, then stop bath and fixer as was done with the contact print.
Make a final print. Select the best exposure from the test strip and make and set the timer accordingly. Place a sheet of paper in the easel and press the expose button on the enlarger timer. Process the paper as usual. As with the contact print, the paper should remain in the paper developer for at least 2 minutes in order to produce a rich black. The paper may remain in the developer longer in order to make the image darker. Removing the paper from the developer too early will yield uneven gray tones instead of black.
Local exposure control. When a complete print is made, it may be noticed that almost all of the image has a very pleasing density, bit one small area is slightly dark. If the exposure were reduced to bring detail to the dark area, the rest of the print will be too light. Instead of reducing the light to the entire image, a small piece of tape or cardboard on the end of a wire can be used to withhold light from the dark area without affecting the rest of the print.
Dodging is the name given to this local blockage of exposure to lighten a specific area of the print. Make a dodging tool by folding a small piece of black photographic tape over the end of a piece of wire (a piece of coat hanger will do). Let’s say the exposure for the whole print is 10 seconds. Press the expose button. While the exposure is being made, insert the wire into the light path, blocking the exposure of the area which is too dark. Block it for a second or two of the ten second exposure. Moving the dodging tool about slightly, and keeping it a good distance from the paper will produce diffuse edges allowing the dodged area to blend into the rest of the print. Process the paper and evaluate the results. Make adjustments to the dodging time or location as necessary.
Burning is the opposite of dodging. The entire print look pretty good, but there is one small area that is too light. Increasing the exposure of the entire print to see detail in the light area will make the rest of the print too dark. So we leave the base exposure alone and add a little more exposure to the area which is too light. A piece of cardboard with a hole cut in it will do nicely for this purpose.
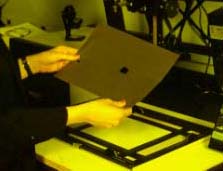
Burning Tool
Let’s use a 10 second time as the example for a base exposure. Press the expose button and allow the entire print to be exposed. After the exposure is completed, place the cardboard between the lens and the paper, near to but not touching the lens, blocking the light from striking the paper. With the focus switch on the enlarger timer, turn on the enlarger light. Move the cardboard quickly, so that the hole allows additional light to spill onto the paper over the area you wish to darken. Count two or three seconds. Moving the hole about while burning an area of the print will allow the edges of the burned area blend into the surrounding areas on the print.
Contrast Filters can be used with variable contrast printing papers to increase or reduce the contrast of the print. Variable contrast papers are normally coated with a high contrast and a low contrast emulsion. With no filtration, both emulsions are exposed and a "normal" contrast is achieved. Placing a yellow filter into the light path will select the low contrast emulsion over the high contrast one, lowering the contrast in the print. Placing a purple filter into the light path selects the high contrast emulsion, raising the contrast in the image.
Contrast filters are sold in sets and are manufactured by the maker of the paper to match their specific emulsions. For best results, use the filter set made for your paper.
|
