Printing Angiograms
|
Janice Clifton, CRA COT |
Paul R. Montague, CRA FOPS |
Photographic Illustrations by |
A wide variety of equipment can be used to make photographic prints, varying in levels of automation and sophistication. For this overview the minimum equipment for producing both enlargements and contact prints on film or paper will be outlined.
A Dark Room is essential for printing. In large processing facilities dark rooms designed for printing differ from those intended for camera film processing. Film processing darkrooms are almost always painted black. Any small amount of light that might peek in from somewhere is absorbed by the black walls preventing the film from being exposed.
Printing darkrooms are sealed from extraneous light in the same way a film darkroom is. When the door is closed and all of the lights are out, the room should be completely dark with no light leaking in around the door or from other sources. The primary difference is that printing darkrooms are painted white. At first, this concept might seem insane, but read on….
Photographic paper and films used for positives are not sensitive to all colors of light. Papers can be handled safely under yellow light, and printing films can be handled safely under red light. The light fixtures which produce the correctly colored illumination are called safe lights. In the printing darkroom, we want all white light to be kept outside, but we want the safe light to bounce everywhere, evenly illuminating the entire room. White walls facilitate this even illumination.
The Enlarger is the core piece of equipment used in the print darkroom. Most enlargers handle a variety of film sizes. Light from an enclosed lamp travels through the negative then through an image-forming lens to the printing paper, enlarging the image. The enlarger head can be raised on it’s stand, moving the negative away from the paper and making the image larger. When a negative is not inserted in the enlarger, the light source can produce an even illumination for producing contact prints.
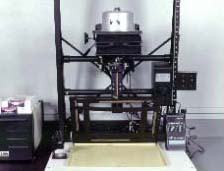
The Enlarging Lens is often purchased separately from the enlarger. The quality of the lens is a key component in the sharpness of enlargements. The lens contains an iris diaphragm similar to the one found in camera lenses which is used to regulate the intensity of light striking the paper. Enlarging lenses are available in a wide variety of focal lengths which are generally matched to the film size. 50mm enlarging lenses are generally used with 35mm film.
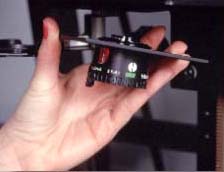
The Enlarger Timer is most often a digital timer. The enlarger is plugged into the timer and the timer is plugged into the wall. A switch on the timer turns the light on continuously for focusing and setup. Dials are used to set the amount of time for which the paper is to be exposed, which can be regulated accurately in 1/10 second intervals.
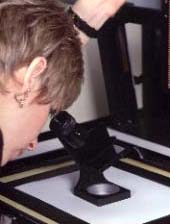
A Focusing Magnifier is used to view the projected image. A mirrored device with a viewing eyepiece, it is placed on the printing easel and used to magnify the image for critical focusing. Some magnifiers enlarge the image to the point that the grain in the film can be easily seen. These grain focusers provide the most accurate results.
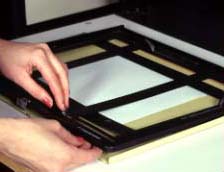
The Paper Easel is placed on the base of the enlarger and holds the paper flat during exposure. Easels made for a single size of paper (5x7 inch for example), are called Speed Easels and produce images with ¼ inch fixed borders. Adjustable easels can handle a variety of paper sizes and can be used to produce prints with varying border widths.
The Paper Safe is a light-tight box in which 100 or more sheets of photographic paper can be stored. While it is not required equipment, it can speed the printing process considerably, eliminating the need to unbox and unwrap the paper for each exposure, re-boxing and re-wrapping it before the next set up.
Safe lights provide illumination in the specific color to which the photographic paper is not sensitive. Some safe lights use a standard white light bulb and a colored filter. Since the filters do not perfectly eliminate all of the white light, a fairly week bulb is normally used, producing a fairly dim light. Safe lights like the Thomas Safelight use a special light source that is void of most unwanted wave lengths. These lights can produce a very bright light to which the paper is not sensitive, but their cost is considerably higher than the filtration type.
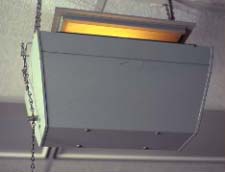
Contact prints made on film are generally printed on ortho film. Ortho film is not sensitive to red light. Making contact prints on ortho film requires the use of a red safe light. The safe light (or safe light filter) used for paper cannot be used for ortho film.
A Squeegee is a rubber blade used to remove excess water from prints before drying.
The Darkroom Timer can be the same Gralab timer used when processing film. It is a large-dial timer for timing prints in the developer. The enlarger timer cannot be used for this purpose.
Print Tongs are used to grasp the paper during processing and transfer the paper from one processing tray to the next. At least three tongs are required: One for the developer, one for the stop bath, and one for the fixer. Paper should never be moved from tray to tray with fingers…..Not even with gloves! The reason is that the chemistry may become contaminated and fixer on your fingers will destroy the next piece of unprocessed photographic paper you touch!
Photographic Trays are shallow, flat trays used to process paper and print film. 10x12 inch trays work perfectly for 8x10 prints and contact sheets.
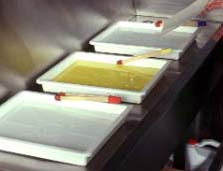
The Wash Tray is usually deeper than the printing trays A siphon can be attached to the side of this tank if a larger photographic sink is available. If not, it can be filled with water and used as a holding tank until the prints can be washed properly.
A Contrast Filter Set is used to select the contrast of the image when using variable contrast printing paper.
Photographic Paper comes in many types and sizes. The type most commonly used in ophthalmology is glossy, variable contrast, resin coated paper. Glossy means that the surface has a high gloss to it. Other surfaces are available. Variable contrast means that the paper can be used with contrast filters to produce images that are higher or lower in contrast. Resin coated means that the paper has a plastic-like coating on it which prevents water from absorbing into the paper base. Non-resin coated papers are called fiber based papers. Fiber based papers require longer wash times and much longer drying times. They are generally used for fine arts photography.
A Contact Print Frame is used to hold the negatives flat against the printing paper when making contact prints. A piece of 10x12 inch plate glass, 1/4 inch thick with ground edges, may be used in place of the contact print frame.
|
