Printing Angiograms
|
Janice Clifton, CRA COT |
Paul R. Montague, CRA FOPS |
Photographic Illustrations by |
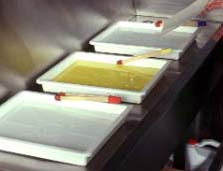
Preparation. Before making contact prints, set out three print trays and a wash tray. If a photographic sink is available, the wash tray can be connected directly to a water source for washing as prints are produced. If not, the wash tray should be filled with water to hold prints until they can be washed properly under running water later.
Mix developer, stop bath, and fixer according to the instructions. The level of developer in the tray should be about ½ the height of the tray. A 10x12 inch tray will hold about ½ gallon of liquid. Place the developer in the left tray, the stop bath in the middle tray, and the fixer in the right tray with the wash tray to the right of these. Place a pair of print tongs in each tray without getting the handle wet.
Because we will be working with a safe light, the print can be viewed as it develops. For this reason, the temperature of the print developer is not as critical as it is for film, but it should be at room temperature, approximately 70o F.
Cut the negatives to be printed into strips of six. Close the door to make sure there are no significant light leaks, and turn on the safe light.
Setting the enlarger. With no negative in the enlarger and with the negative carrier in place, turn on the enlarger light using the focusing switch on the enlarger timer. Twist the f-stop ring on the enlarger ring until the light is at it’s brightest. Raise the enlarger until the projected rectangle of light is large enough to cover an 11x14 in area on the base board. Twist the focusing knob on the enlarger until the edges of the rectangle are roughly in focus and readjust the height if necessary.
As the f-stop ring on the enlarging lens is twisted, small "clicks" can be felt. Each click allows twice as much (or half as much) like as the adjacent click. When the f-stop ring is set to allow the most light to pass through, the lens is open. When it is set to allow the least light, the lens is closed. Photographers will commonly give instructions like, "Close the lens two stops.", meaning, "Twist the f-stop ring two clicks, making the image darker."
The lens was set to open when adjusting the enlarger height. To prepare for a test exposure, close the lens, then open it two stops.
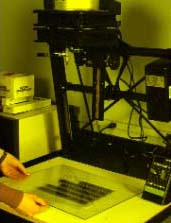
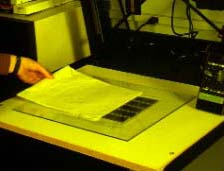
Set up contact print and making a test strip.
Test Strips. A test strip is a series of exposures on a single piece of paper that is made to test the amount of light required for a particular negative. Imagine that a piece of photographic paper is beneath the enlarger light. A piece of 8 ½ x 11 inch cardboard is place over the photographic paper so about 1½ inches of the paper will be exposed to the enlarger light. An exposure is made for two seconds. Call this little exposed strip "StripA". The cardboard is moved so that another 1½ inch of paper will be exposed, and another two second exposure is made. Our "Strip A" has now received four seconds of exposure, and our new "Strip B" has received two seconds. Repeat the process again. "Strip A" now has six seconds of exposure, "Strip B" has four seconds, and our new "Strip C" has 2 seconds. When repeated all the way across the paper, we will have strips of 2, 4, 6, 8, 10 and 12 seconds. After processing, the most pleasing exposure will be chosen for a final exposure.
Making a test strip. Place a piece of paper on the enlarger base, emulsion side up. Remove the negatives from the their protective sleeves and place them directly in contact with the paper, emulsion side down. (The emulsion side of the film is usually the less shinny side.) Place a piece of ¼ inch plate glass on top of the negatives, pressing them flat against the paper. Place a piece of cardboard over the plate glass, and expose a test strip as described above.
Processing the test strip. Set the darkroom timer to several minutes (30 or more will do). Without getting your fingers wet, place the paper in the developer, emulsion side down. Note the time on the timer. We’re going to leave the paper in the developer for two minutes. With the print tongs, flip the print over in the developer so it is face-up. Agitate the tray slightly by rocking it or by move the print about in the developer with the print tongs.
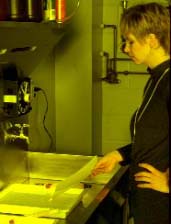
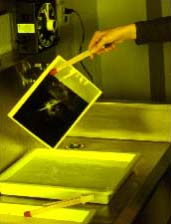
After two minutes in the developer, remove the print from the developer and place it in the stop bath using the developer print tongs, but without allowing the tongs to enter the stop bath. If the developer tongs are permitted to enter the stop bath, placing them back in the developer will contaminate the developer.
After a few seconds in the stop bath, remove the print using the stop bath tongs and place it in the fixer. If the stop bath tongs come in contact with the fixer, no harm is done. They may be placed back in the stop bath without danger of harmful contamination.
After two minutes in the fixer, the room lights may be turned on to evaluate the print. The darkest strip received the most light. Choose the strip that looks best and calculate the time by counting the strips. We are ready to make a final exposure.
One word of caution here… I will be tempting to remove the wet print from the fixer and hold it beneath the light of the enlarger to evaluate it. DON’T DO IT!!! Keep the dry area Dry.
Making a final exposure. Set the timer to the number of seconds determined to be the best exposure time. Place another piece of paper on the enlarger base, emulsion side up. Place the negatives on the paper, emulsion side down. Place the glass on top of the negatives. Without using the cardboard, make the exposure and process the paper as above.
Adjusting exposures. This "final exposure" might not be final at all. You might decide that the print is a little too light or a little too dark. Prints can be darkened slightly by leaving them in the developer a little longer than two minutes. They should not, however, be made lighter by shortening the development time. The reason is that it takes about two minutes in the paper developer to produce a hard black. Anything less and the black will be muddy gray.
Major adjustments in the darkness of the print are made by altering the exposure and making another print. Less light makes the print lighter. More light makes the print darker. Either the time or the lens can be adjusted to make these corrections.
When adjusting the lens, a small movement goes a long way! Remember that closing the lens down by one "click" reduces the light by half. As an exercise, consider a good print that was exposed for 5 seconds at an f-stop near the middle of the lens’ f-stop range. If the lens is closed down by 1 stop, ½ the amount of light is coming through the lens. If the exposure time is then doubled to 10 seconds, we have ½ the amount of light for twice the length of time…. The two prints should be identical.
The relationship between f-stops and exposure time in printing is exactly the same as the relationship between f-stops and shutter speeds on a camera.
|
