Processing Angiograms
|
Janice Clifton, CRA COT |
Paul R. Montague, CRA FOPS |
Photographic Illustrations by |
Consistency is an extremely important component in obtaining repeatable results when processing film. Whether the timer is started before or after the chemistry is poured into the processing tank is of little importance providing it is always done in the same way. Small changes in the temperature of the developer, the time the film is in the developer, the frequency and method of agitation when the film is in the developer, and a wide variety of other factors can make dramatic changes in the density and contrast of the final image. Use the procedures outlined here as guidelines. Over time you will develop techniques that you are comfortable with which produce good results. If you are not consistent in your method, adjustments to fine tune the quality of your negatives will be difficult or impossible.
Agitation is required during processing to keep fresh developer near the surface of the film. Without agitation, especially in the developer development will be uneven, often producing bars of alternating light and dark areas across the film. Techniques for agitation differ between metal and plastic reels.
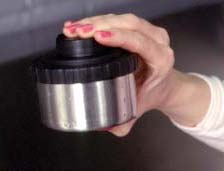
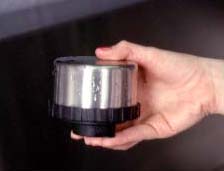
Metal reels are usually agitated by grasping the tank in the palm of the hand with the palm facing downward, then, in about a one-second movement, rotating the hand so the palm faces upward. This is immediately followed by another one-second movement rotating the hand so the palm is facing downward once again. These two-second agitation cycles are generally performed three times every thirty seconds, providing about six seconds of agitation for every thirty second interval.


Plastic reels are usually agitated by grasping the plastic spindle which protrudes from the top of the tank and twisting it back and forth slowly. This rotational agitation is performed for about six seconds every thirty seconds.
At the end of each agitation cycle, the tank is rapped lightly on the counter top or sink two or three times. This dislodges any air bubbles which might be clinging to the film as a result of agitation.
Developer can be used once and discarded, or can be saved and reused. If developer is reused, pour it back into the developer container after processing film. With each successive roll of film that is processed the developer becomes slightly less active. This mandates an increase in development time as the developer ages to compensate for the lower activity. The developer comes with a chart that outlines the amount of time to add as the developer is used.
Greater consistency can generally be obtained by using the developer once and discarding it. The exception can be found in larger processing labs where tanks which hold 3½ to 25 gallons of developer are used. The developer is usually replenished by adding a special developer replenisher which replaces the used chemicals in the developer. Accurate replenishment requires the use of a densitometer to measure the activity of the developer, and is beyond the scope of this text.
Processing times vary depending upon the exact chemistry chosen, the film type, and the light output of the fundus camera. The following times and temperatures should be a good starting point using the chemistry given as an example in the chemistry section.
| Step | Solution | Temperature | Time |
|---|---|---|---|
| Developer | HC-110 Dilution A | 70o ± ½o F. | 5 minutes |
| Stop Bath | Kodak Indicator Stop Bath | 70o ± 3o | 30 seconds |
| Fixer | Kodak Rapid Fix | 70o ± 3o | 6 minutes |
| Rinse | Running Water | 70o ± 3o | 30 seconds |
| Hypo Clear | Hustler Rapid Bath | 70o ± 3o | 30 seconds |
| Rinse | Running Water | 70o ± 3o | 5 mintues |
| Wetting Agent | Kodak Photo Flo | 70o ± 3o | 30 seconds |
| Dry | Not over 120o F. |
Steps for processing film
- Load the film onto the reel, and place the lid on the tank.
- Place enough developer to fill the processing tank in a small open-mouthed container. If you are processing only one roll of film in a two-reel tank, place an empty reel in the tank to fill the vacant space, and still use enough developer to fill the tank completely.
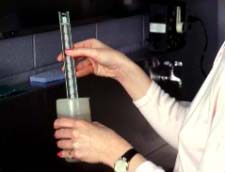
- Check the temperature of the developer. Raise or lower the temperature by placing the open-mouthed container in warm or cool water until the proper temperature is reached (70o F. for our example).

- Set the development time plus 15 seconds on the GraLab timer (5 minutes 15 seconds for our example). The extra 15 seconds allows you to start the time, then prepare to pour the developer into the tank after the 15 seconds has expired.
- Start the timer.
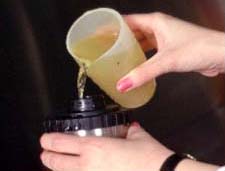
- When the extra 15 seconds has expired, begin pouring the developer into the tank through the light-tight hole in the lid of the can.

- Agitate the film continuously for the first 30 seconds. Metal reels are rocked in the hand and plastic reels are rotated as described above.
- Rap the tank once or twice on the counter top or sink to dislodge air bubbles. Gentle taps are sufficient. Don’t dent the sink or crack the counter top.
- During development, agitate the film for five or six seconds every thirty seconds.
- Fifteen seconds before time expires, begin pouring the developer from the tank.
- Pour the stop bath into the tank, agitate for 30 seconds, and pour the stop bath out. The 30 second time for the stop bath is not critical.
- Pour the fixer into the tank and set the timer for the fixer time (6 minutes for our example). Agitate continuously for the first 30 seconds then six seconds every minute thereafter.
- Pour the fixer from the tank. Fixer is almost always saved for reuse
At this point the top may be removed from the tank. The film is no longer sensitive to light.
- Rinse under running water for 30 seconds.
- Pour in the hypo clearing agent. Agitate continuously for 30 seconds and discard the used hypo clearing agent.
- Rinse under running water for 5 minutes.

- Pour in wetting agent (Photo Flo in our example). Do not agitate! Wetting agents create foam when agitated.
- Hang film to dry, placing a clothes pin or weighted clip at the bottom of the film to prevent curling.
|
