Processing Angiograms
|
Janice Clifton, CRA COT |
Paul R. Montague, CRA FOPS |
Photographic Illustrations by |
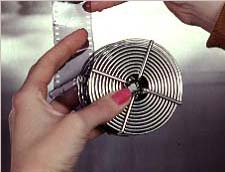
Loading the processing reel is a skill that must be mastered for successful film processing. Every hear the saying, "I could do that with my eyes closed"? Well, in this case, it’s a necessity.
There are two sides to the film: The emulsion side and the base side. When the film is rolled on it’s spool inside the cassette, the emulsion side of the film is the inner side, the side which faces the camera lens when loaded for picture taking. The emulsion side is the side that will contain the image and the only side that is acted upon by the developer. Anything which comes in contact with the emulsion side of the film during processing will hinder proper development of the image. If the emulsion side of the film is touched by oily fingers, the finger print may be developed into the negative.
Processing reels are a continuous spiral into which the film is loaded, preventing the film from touching itself during processing. Mishandling of the film or improper loading of the reels may damage part or all of the angiogram.
The key to perfection in loading spiral reels is practice. Check with a local professional photo supply store to see if they have any outdated film which is about to be discarded. This makes perfect practice film! Once a roll of film has been incorrectly loaded onto a reel, small dents in the film edges make it very difficult to load correctly the second time. Consequently, a sizeable supply of test film will be required before you are ready to get on with the real (or reel) thing. Practice in the light first. When the technique has been perfected, try again with you eyes closed. Only peek when you feel something going wrong. Then try with the lights out. And finally, if you are going to load film in a changing bag, practice loading film in the bag until the technique is perfected.
When practicing, load the film onto the reel then unload it. Examine the film as you pull it slowly from the reel, looking for indentations on the edges of the film which indicate the film slipped out of the spiral, or small half-moon shaped creases in the center of the film indicating that the film was kinked during loading.
And away we go!
If you are using a changing bag, place the film cassette, the can opener, the scissors, the processing reel, the tank, and the tank lid in the bag and zip it shut. If you are in a darkroom, make sure these things are easily accessible on the counter.
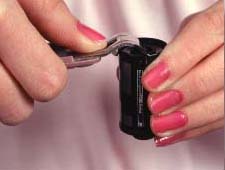
Using the blunt end of the can opener, pry open the end of the film cassette. Opening the end opposite the spool extension is easiest. Remove the film and the spool from the cassette. Remember not to touch the inner surface (emulsion side) of the film with your fingers. This may be difficult it you have just dropped the spool of film on the floor and are now more concerned with finding it in total darkness than with which side you touch, but do the best you can.
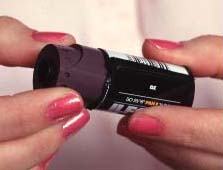
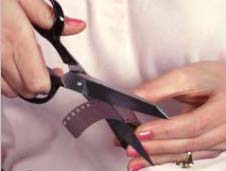
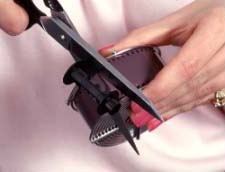
There is an irregular shaped tab on the end of the film. This is the end that threaded onto the take-up spool in the camera. Cut it off with the scissors. If you’re not too handy with scissors, wait until the bleeding stops before continuing.
The reel loading procedure is a little different between plastic and metal reels. If you’re using plastic reels, skip to the plastic reels paragraph.
Metal Reels. Hold the film in one hand so that it unwinds off the top of the spool. Unwind a few inches and hold the end of the film between the thumb and forefinger allowing the spool fall from the hand. Apply a slight amount of pressure between the thumb and forefinger to cause the film to bow upward.
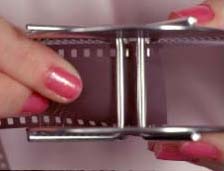
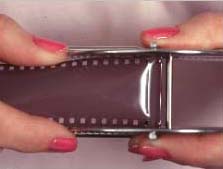
Hold the metal reel in the other hand with the end of the spiral point toward the film. If you are doing this in the light for the first time, find the end of the spiral by looking at it, then practice finding it in the dark.
With the film bowed slightly, insert the end of the film directly to the center of the reel and place it under the clip or wire to hold it firmly in place. Maintaining slight pressure on the sides of the film, wind the film onto the reel, from the inside out by rotating the reel in a circle, away from the film. Continue until all of the film has been wound onto the reel.
Do not force the film onto the reel! It should flow onto the reel evenly and smoothly. Loading reels is something that is done by touch. If you feel anything irregular, STOP, unwind the film slightly and continue.
Plastic Reels. Plastic reels load from the outside in. Place the end of the film in the outer most edge of the groove in the reel until the film catches. The opposing edges of the reel are twisted back and forth, pulling the film onto the reel.
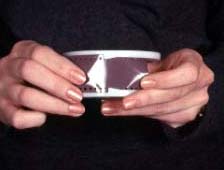
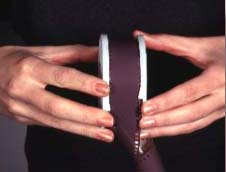
Plastic and metal… At the end of the film, trim off the spool with the scissors. Place the reel into the can and cover it with the light-tight lid. Once the lid is on, all other steps can be performed in the light.
|
